Streamline Lamp Check with a Magic Sheet - ETC Eos
How-to Build a Magic Sheet for Faster, More Thorough Lamp Check
Efficiently managing and maintaining lighting fixtures is crucial for smooth productions. One useful tool for simplifying the lamp check process is creating a magic sheet using ETC's Eos consoles or software, ETCNomad. In this blog post, we will explore how to create a comprehensive magic sheet that makes lamp check a breeze. By following these steps, you can streamline the lamp check process and ensure your lighting rig is in optimal condition for every performance.
Step 1: Open ETCNomad and Load Your Show File
To get started, open the ETCNomad software on your computer. If you've already created a show file, you can load it by selecting "File" > "Open Show." If you don't have a show file yet, create a new one by clicking on "File" > "New."
Step 2: Open the Magic Sheet Editor
Now, it's time to start creating your magic sheet. Navigate to the "Displays" tab located on the top of the screen and select "Magic Sheet." This action will bring up the Magic Sheet Editor.
Step 3: Organize Your Magic Sheet Workspace
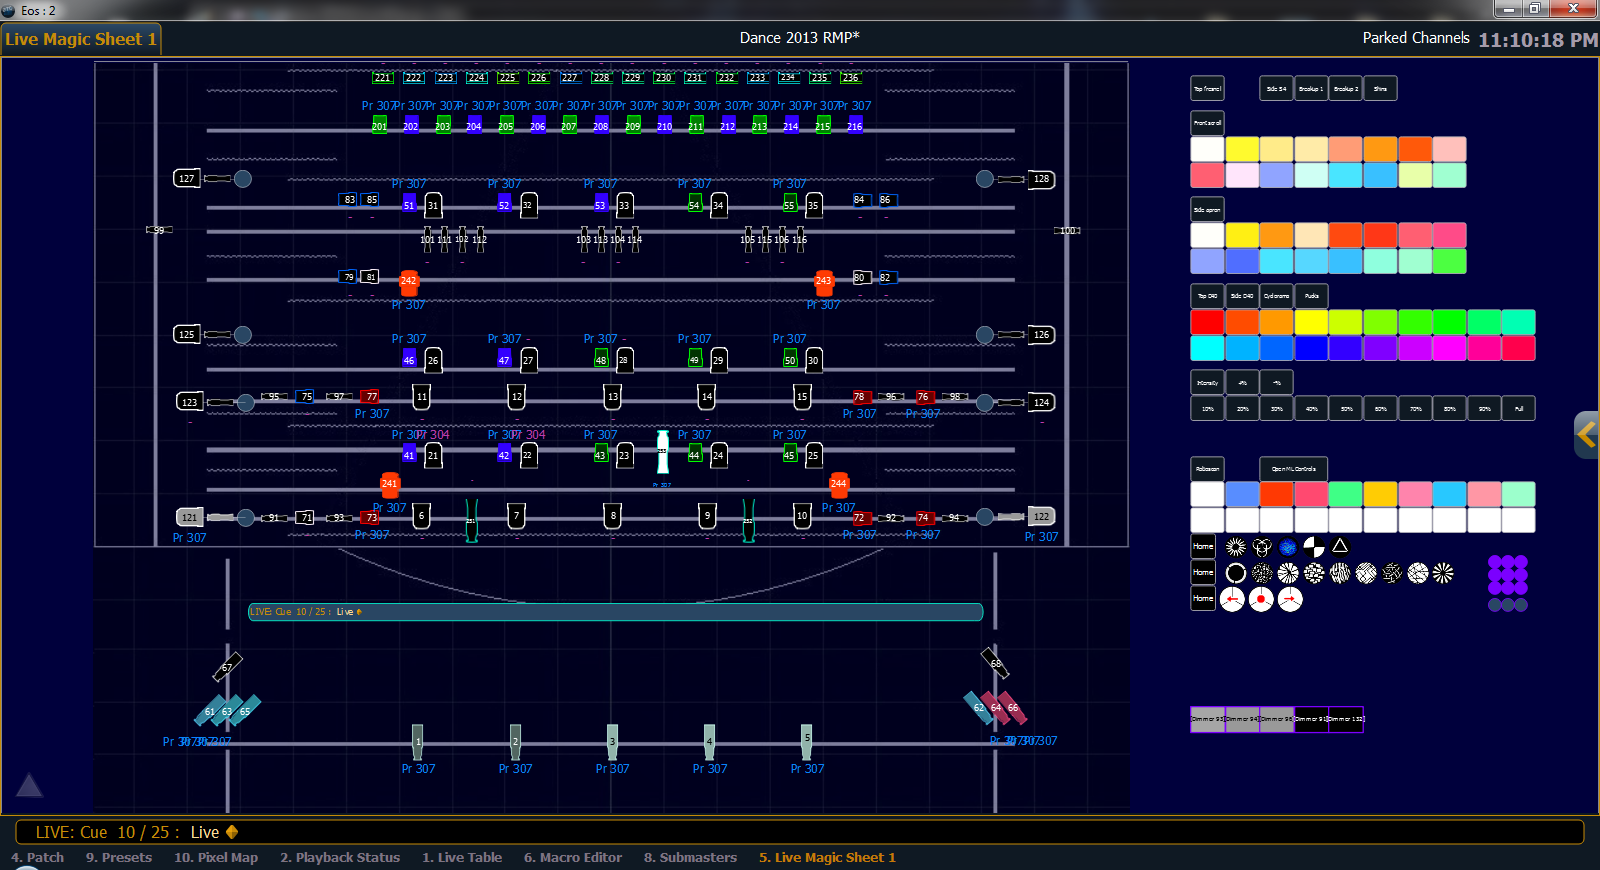
Within the Magic Sheet Editor, you'll see a blank canvas to layout your fixtures. To differentiate between FOH and onstage fixtures, consider dividing your workspace into separate sections. You can add a horizontal or vertical line from the "Add Lines and Shapes" menu on the left side of the screen. Select the "Line" tool and draw a line to create distinct areas.
Step 4: Add Fixtures to Your Magic Sheet
Now, let's add your fixtures to the magic sheet. Go to the "Add Items" menu, select the "Channel" option and then click on the workspace where you'd like to place the channel representing a fixture. A pop-up window will appear, allowing you to enter details such as the channel number and label. Keep adding channels for all your fixtures, positioning them in their respective sections of the workspace.
Step 5: Personalize Your Fixtures' Appearance
You can further refine your magic sheet by customizing the look of your fixtures. This can be done by selecting a fixture, then adjusting its properties in the "Properties" panel located on the right side of the screen. You might change their color, size, or shape to better represent their location or type.
Step 6: Form Groups for Simplified Lamp Checks
For easier lamp checks, it's beneficial to create groups of your fixtures. Click on the "Group" tool in the "Add Items" menu, then drag a selection box around the fixtures you want to group together. In the "Properties" panel, you can assign the group a meaningful name, like "FOH Fixtures" or "Onstage Fixtures."
Step 7: Save and Assign Shortcut Key to Your Magic Sheet
Once you've configured your magic sheet, be sure to save it by clicking "File" > "Save." You might also assign a shortcut key to your magic sheet for quick access during lamp checks. To do this, select "File" > "Assign Shortcut Key," and choose a key from the available options.
Conclusion
Thanks to your magic sheet in ETCNomad, you're now ready to perform quick and efficient lamp checks for your FOH and onstage fixtures. This tool not only boosts your workflow but also facilitates better communication and cooperation among your team. Take advantage of the magic sheet today and feel the difference in your lamp checks!
Book a meeting with us if you need help getting started or at any point along the way.